Difference between revisions of "Quick Start/en"
(Updating to match new version of source page) |
(Updating to match new version of source page) |
||
| Line 2: | Line 2: | ||
==Start GIMX== | ==Start GIMX== | ||
| − | + | ===Ubuntu or Windows=== | |
| − | |||
| − | |||
| − | |||
| − | |||
| − | |||
| − | |||
| − | |||
| − | ===Ubuntu or Windows | ||
| − | |||
Launch gimx-launcher. | Launch gimx-launcher. | ||
| Line 75: | Line 66: | ||
==Play== | ==Play== | ||
| − | + | ===Ubuntu or Raspbian + bluetooth=== | |
| + | |||
| + | Make sure to read the [[Main_Page#Hardware_requirements|Hardware requirements]]. | ||
| + | |||
| + | ====PS3==== | ||
| + | |||
| + | # Open gimx-launcher. | ||
| + | # In the "Output" drop-down menu, select "Bluetooth / PS3". | ||
| + | # If no previous pairing was defined, you will be asked to create a new pairing. Click on "Yes". | ||
| + | # As requested, connect a Sixaxis / Dualshock 3, and click on "Yes". | ||
| + | # Select the pairing to use and click on "Validate". | ||
| + | # As requested, connect a bluetooth dongle, and click on "Yes". | ||
| + | # Save the bluetooth dongle address as you may wish to restore it later. | ||
| + | # Select the bluetooth dongle, and click on "Validate". | ||
| + | # Make sure you saved the dongle address, and click on "Yes". | ||
| + | # The dongle address will be modified to match the address of the Sixaxis / Dualshock 3. | ||
| + | # If you get an error message, buy a [[Bluetooth_dongle|compatible bluetooth dongle]]. | ||
| + | # Unplug your sixaxis and if it doesn't power off by itself, press the PS button until it powers off. | ||
| + | # In the "Config" drop-down menu, select the configuration file to use. | ||
| + | # Click on "Start". | ||
| + | # Play. | ||
| + | # Press Left Shift + Escape to quit. | ||
| + | |||
| + | ====PS4==== | ||
| − | + | The PS4 only takes inputs from licensed controller.<br /> | |
| + | In order to authenticate itself as a licensed controller, GIMX needs to be connected over bluetooth to a real Dualshock 4 all the time. | ||
| − | + | * Raspbian-specific instructions | |
| − | < | + | The bluetooth service is automatically started when a device tries to connect.<br /> |
| + | This is annoying since it will intercept the connection requests.<br /> | ||
| + | To disable the service, run the following command '''and reboot''':<br /> | ||
| − | + | sudo update-rc.d bluetooth disable | |
| − | + | ||
| − | + | Alternatively, you can stop the bluetooth service and move the bluetoothd binary:<br /> | |
| − | + | ||
| − | + | sudo service bluetooth stop | |
| − | + | cd /usr/sbin | |
| − | + | sudo mv bluetoothd bluetoothd.bk | |
| − | + | ||
| + | The drawback of this second method is that it will need to be performed again after each update of the bluez package. | ||
| + | |||
| + | * AVR USB development board | ||
| + | |||
| + | An [[DIY_USB_adapter#AVR_USB_development_board|AVR USB development board]] is required for pairing the bluetooth dongle with the PS4.<br /> | ||
| + | The same board can be used to build a DIY USB adapter, but no USB to serial TTL converter is needed here.<br /> | ||
| + | The firmware with the needed "atmega32u4.hex" file is available at: http://gimx.fr/download/EMUPS4PAIRING.7z<br /> | ||
| + | Load this firmware as explained in the [[DIY_USB_adapter#Firmware_loading|Firmware loading]] instructions. | ||
| + | |||
| + | * First-start instructions | ||
| − | + | # Open gimx-launcher. | |
| + | # In the "Output" drop-down menu, select "Bluetooth / PS4". | ||
| + | # If no previous pairing was defined, you will be asked to create a new pairing. Click on "Yes". | ||
| + | # As requested, connect a [[Bluetooth_dongle|compatible bluetooth dongle]], and click on "Yes". | ||
| + | # As requested, connect a Dualshock 4 with a micro USB cable, and click on "Yes". | ||
| + | # Select the pairing to use and click on "Validate". | ||
| + | # Connect the AVR USB board (e.g. Teensy 2.0) and click on "Yes". | ||
| + | # As requested, connect the AVR USB board to the PS4, and wait a few seconds. | ||
| + | # Connect the AVR USB board back to the computer, and click on "Yes". | ||
| + | # A new pairing should appear in the "Pairing" drop-down menu. | ||
| + | # Unplug the Dualshock 4. | ||
| + | # In the "Config" drop-down menu, select the configuration file to use. | ||
| + | # Click on "Start". | ||
| + | # Press on the PS button of the Dualshock 4. | ||
| + | # Play. | ||
| + | # Press Left Shift + Escape to quit. | ||
===Ubuntu or Windows + DIY USB adapter=== | ===Ubuntu or Windows + DIY USB adapter=== | ||
| Line 99: | Line 141: | ||
* Xbox 360: it is required to have a genuine wired controller (the play and charge cable won't work) wired to the PC at startup. In Windows, the 360 controller has to be unplugged/replugged before each spoof attempt.<br /> | * Xbox 360: it is required to have a genuine wired controller (the play and charge cable won't work) wired to the PC at startup. In Windows, the 360 controller has to be unplugged/replugged before each spoof attempt.<br /> | ||
| − | * Xbox One: it is required to have a genuine controller wired to the PC at startup. In Windows, the Xbox One controller has to be unplugged/replugged | + | * Xbox One: it is required to have a genuine controller wired to the PC at startup. In Windows, the Xbox One controller has to be unplugged/replugged each time the AVR USB board or the console are power-cycled.<br /> |
| − | * PS4: it is required to have a genuine DS4 wired to the PC all the time. | + | * PS4: it is required to have a genuine DS4 wired to the PC all the time.<br /> |
| + | |||
| + | '''Note: when using a console that requires authentication, make sure to turn off the controller before connecting it to the PC.''' | ||
====Start==== | ====Start==== | ||
| Line 111: | Line 155: | ||
# Select the configuration file to use | # Select the configuration file to use | ||
# Click on Start | # Click on Start | ||
| − | # Play | + | # Press the PS button on Playstation consoles, or the Home button on Xbox consoles. |
| + | # Play | ||
| + | # Press Left Shift + Escape to quit | ||
Revision as of 12:18, 9 March 2016
Contents
Start GIMX
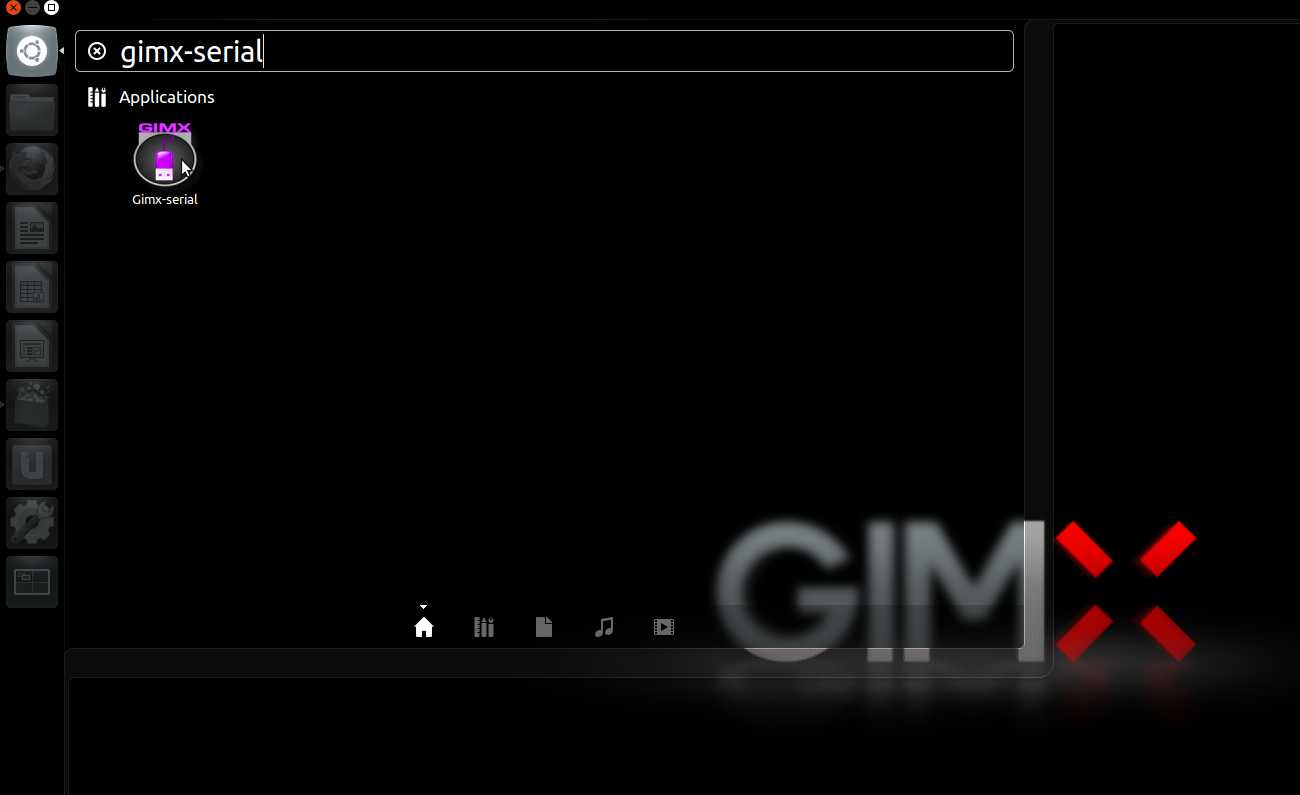
Ubuntu or Windows
Launch gimx-launcher.
TODO: update screenshot
Config file download
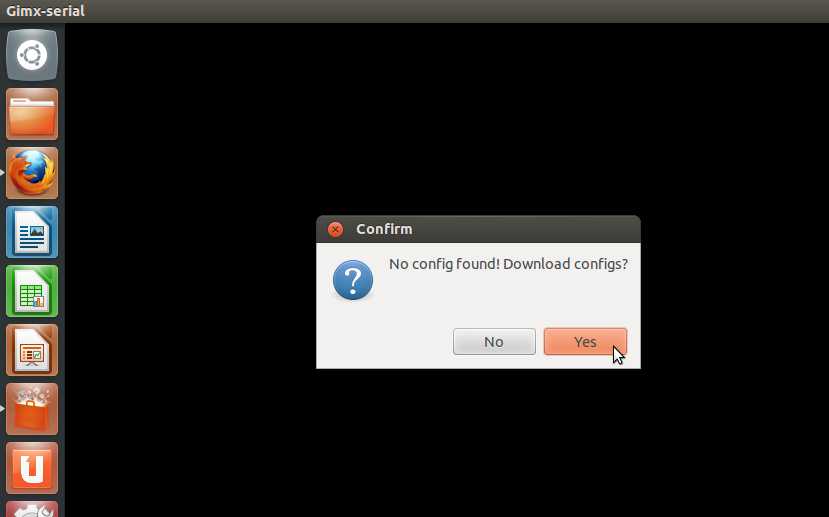
A few config files are shared by users of the GIMX community, and can be downloaded from gimx-launcher.
Please contribute by sharing your own configs in the Configuration and Requests forum section.
The first time gimx-launcher is started, if there is no config file present on the PC, a message box will ask you if config files should be downloaded.
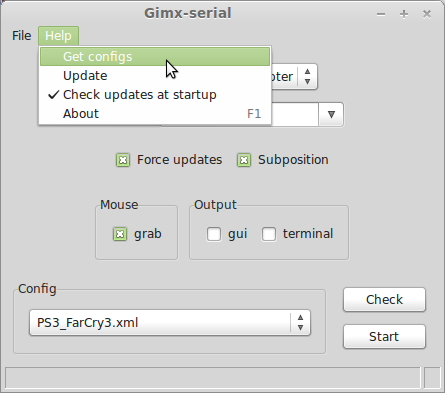
The config file downloader is also available through the "Help>Get configs" menu entry.
The config file downloader displays all config files available to download:
The config name syntax is: <CONSOLE>_<GAME>_<AUTHOR>.xml or <CONSOLE>_<OS>_<DEVICE>_<AUTHOR>.xml.
Examples:
- PS3_Battlefield3_McKack.xml: config file built by McKack for the PS3 version of Battlefiled 3.
- PS3_LINUX_X360Pad.xml: config file to use in Linux with a 360 pad and a PS3.
Mouse sensitivity conversion
This part is for the FPS gamers.
Before using a prebuilt config file, you have to convert the sensitivity so that it matches your own mouse DPI.
Make sure to set the in-game sensitivity to the highest, and make sure to have your mouse tracking at its highest DPI setting (examples: Logitech G5 @2000DPI, Logitech G500 @5700DPI).
GIMX provides means to convert the sensitivity, knowing both the DPI of the source mouse (which can be embedded in the config file) and the DPI of the destination mouse.
If the source DPI and the destination DPI are the same, there is no need to convert anything.
It's possible to do this with gimx-config or gimx-fpsconfig. These tools are further detailed on this page.
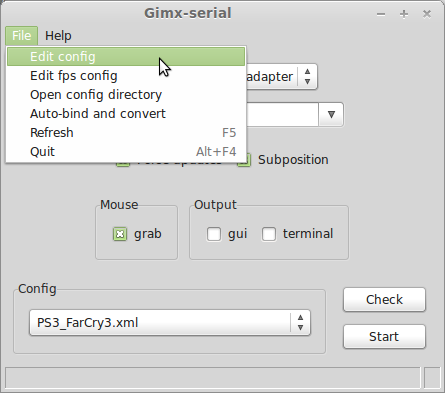
Gimx-config
In gimx-launcher, select the config file, and click on the "File>Edit config" menu item.
This opens the config file with the gimx-config editor.
Click on the "Edit>Convert mouse sensitivity".
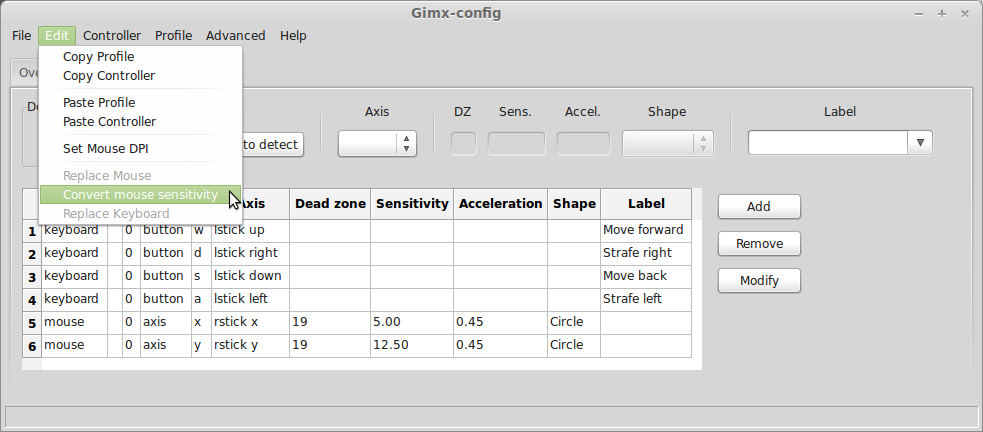
If the config contains no DPI value, a first dialog box is displayed. Enter the source DPI and validate.
A dialog box is displayed. Enter the destination DPI and validate.
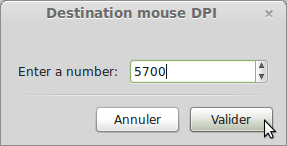
The sensitivity is converted in all profiles (hip fire = profile 1, ADS = profile 2).
Click on the "File>Save".
Gimx-fpsconfig
In gimx-launcher, select the config file, and click on the "File>Edit FPS config" menu item.
This opens the config file with the gimx-fpsconfig editor.
If the source DPI was saved into the config file, the mouse DPI should be different from 0.
Click on the "Convert sensitivity" button. A dialog box is displayed. Enter the destination DPI and validate.
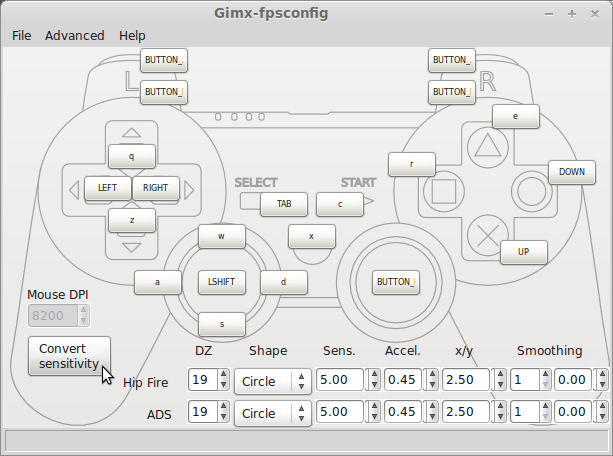
The sensitivity is converted for both hip fire and ADS.
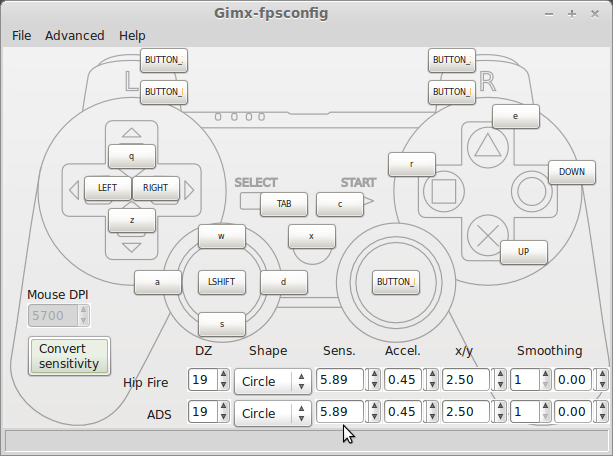
Click on the "File>Save".
Play
Ubuntu or Raspbian + bluetooth
Make sure to read the Hardware requirements.
PS3
- Open gimx-launcher.
- In the "Output" drop-down menu, select "Bluetooth / PS3".
- If no previous pairing was defined, you will be asked to create a new pairing. Click on "Yes".
- As requested, connect a Sixaxis / Dualshock 3, and click on "Yes".
- Select the pairing to use and click on "Validate".
- As requested, connect a bluetooth dongle, and click on "Yes".
- Save the bluetooth dongle address as you may wish to restore it later.
- Select the bluetooth dongle, and click on "Validate".
- Make sure you saved the dongle address, and click on "Yes".
- The dongle address will be modified to match the address of the Sixaxis / Dualshock 3.
- If you get an error message, buy a compatible bluetooth dongle.
- Unplug your sixaxis and if it doesn't power off by itself, press the PS button until it powers off.
- In the "Config" drop-down menu, select the configuration file to use.
- Click on "Start".
- Play.
- Press Left Shift + Escape to quit.
PS4
The PS4 only takes inputs from licensed controller.
In order to authenticate itself as a licensed controller, GIMX needs to be connected over bluetooth to a real Dualshock 4 all the time.
- Raspbian-specific instructions
The bluetooth service is automatically started when a device tries to connect.
This is annoying since it will intercept the connection requests.
To disable the service, run the following command and reboot:
sudo update-rc.d bluetooth disable
Alternatively, you can stop the bluetooth service and move the bluetoothd binary:
sudo service bluetooth stop
cd /usr/sbin
sudo mv bluetoothd bluetoothd.bk
The drawback of this second method is that it will need to be performed again after each update of the bluez package.
- AVR USB development board
An AVR USB development board is required for pairing the bluetooth dongle with the PS4.
The same board can be used to build a DIY USB adapter, but no USB to serial TTL converter is needed here.
The firmware with the needed "atmega32u4.hex" file is available at: http://gimx.fr/download/EMUPS4PAIRING.7z
Load this firmware as explained in the Firmware loading instructions.
- First-start instructions
- Open gimx-launcher.
- In the "Output" drop-down menu, select "Bluetooth / PS4".
- If no previous pairing was defined, you will be asked to create a new pairing. Click on "Yes".
- As requested, connect a compatible bluetooth dongle, and click on "Yes".
- As requested, connect a Dualshock 4 with a micro USB cable, and click on "Yes".
- Select the pairing to use and click on "Validate".
- Connect the AVR USB board (e.g. Teensy 2.0) and click on "Yes".
- As requested, connect the AVR USB board to the PS4, and wait a few seconds.
- Connect the AVR USB board back to the computer, and click on "Yes".
- A new pairing should appear in the "Pairing" drop-down menu.
- Unplug the Dualshock 4.
- In the "Config" drop-down menu, select the configuration file to use.
- Click on "Start".
- Press on the PS button of the Dualshock 4.
- Play.
- Press Left Shift + Escape to quit.
Ubuntu or Windows + DIY USB adapter
Controller authentication
- Xbox 360: it is required to have a genuine wired controller (the play and charge cable won't work) wired to the PC at startup. In Windows, the 360 controller has to be unplugged/replugged before each spoof attempt.
- Xbox One: it is required to have a genuine controller wired to the PC at startup. In Windows, the Xbox One controller has to be unplugged/replugged each time the AVR USB board or the console are power-cycled.
- PS4: it is required to have a genuine DS4 wired to the PC all the time.
Note: when using a console that requires authentication, make sure to turn off the controller before connecting it to the PC.
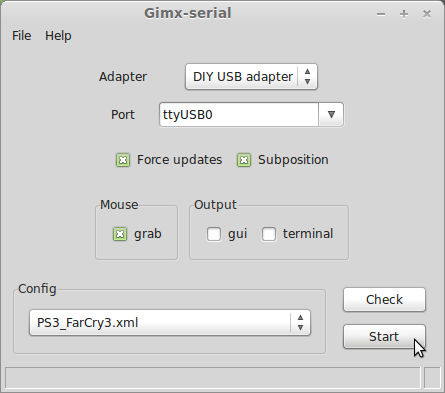
Start
- Turn on the console
- Select the adapter
- Select the serial port
- Select the configuration file to use
- Click on Start
- Press the PS button on Playstation consoles, or the Home button on Xbox consoles.
- Play
- Press Left Shift + Escape to quit