Difference between revisions of "Mouse tweaks/fr"
(Created page with "==Prérequis== Télécharger le '''Driver Signer Enforcement Overrider''': [http://www.ngohq.com/home.php?page=dseo lien]") |
(Created page with "Ensuite télécharger cette archive contenant à la fois le driver USB HID et le DIMR (outil permettant de vérifier la fréquence de la souris), et extraire le dossier '''HID...") |
||
| Line 58: | Line 58: | ||
[http://www.ngohq.com/home.php?page=dseo lien] | [http://www.ngohq.com/home.php?page=dseo lien] | ||
| − | + | Ensuite télécharger cette archive contenant à la fois le driver USB HID et le DIMR (outil permettant de vérifier la fréquence de la souris), et extraire le dossier '''HIDUSBF''' : | |
| − | [http://solidfiles.com/d/ff84/ | + | [http://solidfiles.com/d/ff84/ lien] |
(Credits go out to SweetLow for the drivers - '''We don't offer support for these drivers''' so check the readme file for further instructions, troubleshooting and links) | (Credits go out to SweetLow for the drivers - '''We don't offer support for these drivers''' so check the readme file for further instructions, troubleshooting and links) | ||
Revision as of 11:01, 27 November 2012
À propos
Si la visée est toujours saccadée après avoir suivi les instructions de la page Calibration de la souris, le problème peut être un mauvais réglage de la fréquence de la souris par le système d'exploitation.
Vous êtes seul responsable des dommages que vous pourriez causer à votre console, PC ou périphériques.
Pour Linux/Ubuntu
Cette méthode a été testée avec Ubuntu 10 et 11, mais elle peut aussi marcher avec des versions antérieures, ainsi qu'avec d'autres distribs Linux.
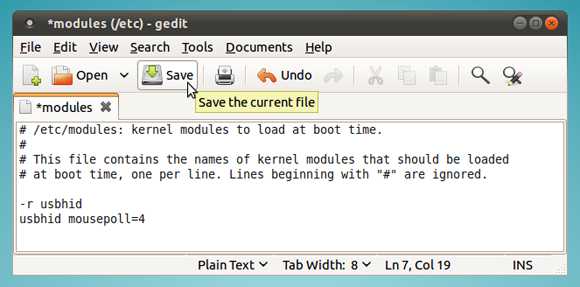
Éditer le fichier modules
Dans un terminal:
gksudo gedit /etc/modules
Après avoir entré le mot de passe (si demandé), le fichier modules sera ouvert dans un éditeur de texte avec les permissions qui permettent de l'éditer.
Ajouter les deux lignes suivantes à la fin du fichier, et enregistrer:
-r usbhid
usbhid mousepoll=NUMBER
http://gimx.fr/img/screenshots/tuto/mt/modules.jpg
Avec NUMBER parmi les valeurs suivantes :
1 = 1000Hz
2 = 500Hz
4 = 250Hz
8 = 125Hz
10 = 100Hz
Exemple pour 250Hz:
-r usbhid
usbhid mousepoll=4
P.S. Une fréquence de 250Hz ou 500Hz est suffisante. 1000Hz peut demander trop de ressources à votre PC et provoquer des saccades (effet inverse à celui désiré).
Redémarrer et vérifier
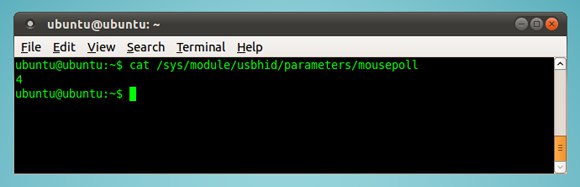
C'est tout ! Redémarrez Ubuntu, vérifiez que le paramètre est appliqué, et vous pouvez tester le nouveau réglage.
Exécutez la commande suivante dans un terminal pour vérifier le réglage :
cat /sys/module/usbhid/parameters/mousepoll
http://gimx.fr/img/screenshots/tuto/mt/ubmp4.jpg
Pour Windows Vista/7
Sous windows, si vous avez une souris comme la Logitech MX518, vous êtes par défaut à 125Hz, contrairement aux Logitech G5, G500 et G400 qui tournent respectivement à 500Hz, 1000Hz et 1000Hz. Il y a un moyen de changer la fréquence par défaut de 125Hz à 250Hz, afin d'obtenir des mouvements plus fluides et un meilleur temps de réponse.
http://gimx.fr/img/screenshots/tuto/mt/250hzemu.jpg
Changer la fréquence de la souris n'est malheureusement pas aussi aisé sous Windows que sous Linux/Ubuntu. Vous devez utiliser un driver USB HID modifié, et pour ce faire passer Windows en Test Mode.
Prérequis
Télécharger le Driver Signer Enforcement Overrider: lien
Ensuite télécharger cette archive contenant à la fois le driver USB HID et le DIMR (outil permettant de vérifier la fréquence de la souris), et extraire le dossier HIDUSBF : lien
(Credits go out to SweetLow for the drivers - We don't offer support for these drivers so check the readme file for further instructions, troubleshooting and links)
It is also recommended to turn off UAC but may not be required (everything must be run as administrator): link
Install the driver and enable Test Mode
To install the driver simply right click the HIDUSBF.INF file in the HIDUSBF folder and select Install
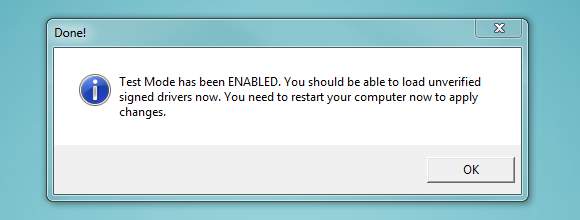
To enable Test Mode, run the Driver Signer Enforcement Overrider (dseo13b.exe) and click the Next button after having selected the Enable Test Mode option.
http://gimx.fr/img/screenshots/tuto/mt/tmenabled.jpg
Restart Windows to complete the process.
Sign the driver
After restarting Windows you'll be in Test Mode, verified by a watermark in the lower right hand corner of your desktop. You'll now be able to sign the driver you installed.
http://gimx.fr/img/screenshots/tuto/mt/tmwm.jpg
To sign the driver, run the Driver Signer Enforcement Overrider again and click the Next button after having selected the Sign a System File option.
In the next window enter the following text into the text field and click OK:
C:\Windows\System32\Drivers\HIDUSBF.SYS
Restart Windows to take the newly signed driver into use.
Adjust your mouse polling rate and verify
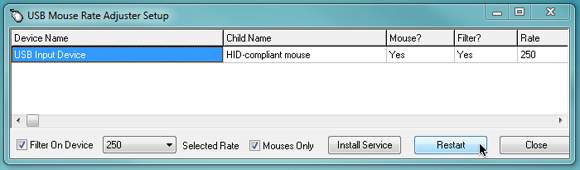
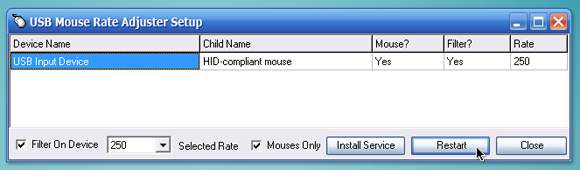
After having restarted Windows, open up the HIDUSBF folder you extracted in the beginning and run Setup.exe
http://gimx.fr/img/screenshots/tuto/mt/rateadjust.jpg
Now, make sure the Mouses Only checkbox is ticked and that you have the right mouse selected if there are several devices listed. Then simply tick the Filter On Device checkbox, select 250 from the Selected Rate dropdown box and click the Restart button.
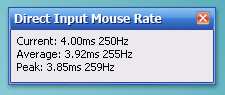
Your mouse should now be running with a polling rate of 250Hz! You can verify this by running the dimr.exe file in the HIDUSBF folder and moving the mouse around.
http://gimx.fr/img/screenshots/tuto/mt/125vs250.jpg Before and after.
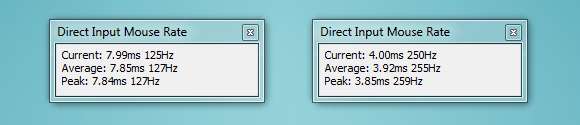
P.S. If the polling rate didn't change you might have to restart Windows for it to take effect.
For Windows XP
Changing the mouse polling rate in Windows XP is a piece of cake compared to Windows Vista/7 since you don't need to sign any drivers and all that jazz.
Download
Download the following archive and extract the HIDUSBF folder anywhere you'd like on your computer: link
(Credits go out to SweetLow for the drivers - We don't offer support for these drivers so check the readme file for further instructions, troubleshooting and links)
Adjust your mouse polling rate and verify
Open up the HIDUSBF folder you extracted in the previous step and run Setup.exe
http://gimx.fr/img/screenshots/tuto/mt/adjustratexp.jpg
Now, make sure the Mouses Only checkbox is ticked and that you have the right mouse selected if there are several devices listed. Then simply tick the Filter On Device checkbox, select 250 from the Selected Rate dropdown box and click the Restart button.
Your mouse should now be running with a polling rate of 250Hz! You can verify this by running the dimr.exe file in the HIDUSBF folder and moving the mouse around.
http://gimx.fr/img/screenshots/tuto/mt/dimrxp.jpg
P.S. If the polling rate didn't change you might have to restart Windows for it to take effect.