
Warning: I'm not responsible for any wrong hardware you can buy, or anything you can do with this.
Required hardware:
- a usb to serial TTL converter - 1Mbps recommended - chip examples: FT232R, CP2102
- a usb development board with a chip among the following: at90usb82, at90usb162, at90usb646, at90usb647, at90usb1286, at90usb1287, atmega16u4, atmega32u4
- USB to serial TTL converter: [list]
- CP2102 converters on ebay (as low as 4$)
- FT232R converters on ebay (as low as 15$)
- CP2102 converter at sparkfun (22$ excl. shipping costs)
- FT232R converter at sparkfun (15$ excl. shipping costs)
- Some devices like the arduino have an on-board usb to serial chip
- A second usb development board can also be programmed as a usb to serial converter.
- Teensy board (atmega32u4, 16$ excl. shipping costs)
- Boards used for the psgroove hack (check the on-board chip).
The hardware I used for my tests is the following:
- Arduino duemilanove (on-board FT232RL) + Bumble-b (discontinued, at90usb162)
- Arduino duemilanove (on-board FT232RL) + Teensy++ (at90usb1286)
- CP2102 board (from ebay) + Teensy 2.0 (atmega32u4)
- CP2102 board (from ebay) + Teensy++ (at90usb1286)
So, you have a usb to serial TTL converter, and a compatible usb dev board?
I/ Load the firmware on the usb dev board
The following archive contains all firmwares: link. I only tested the at90usb162, at90usb1286 and atmega32u4 firmwares.
Load the proper hex file to your board with the Teensy loader, the Flip utility from Atmel, or the dfu-programmer command-line tool.
dfu-programmer example:
Code: Select all
sudo dfu-programmer at90usb162 erase ; sudo dfu-programmer at90usb162 flash at90usb162.hex
The only thing you have to do is to solder 3 wires between these two devices:
GND <--> GND
RX <--> TX
TX <--> RX
The example below shows how to connect a CP2102 converter (left) to a Teensy board (right):
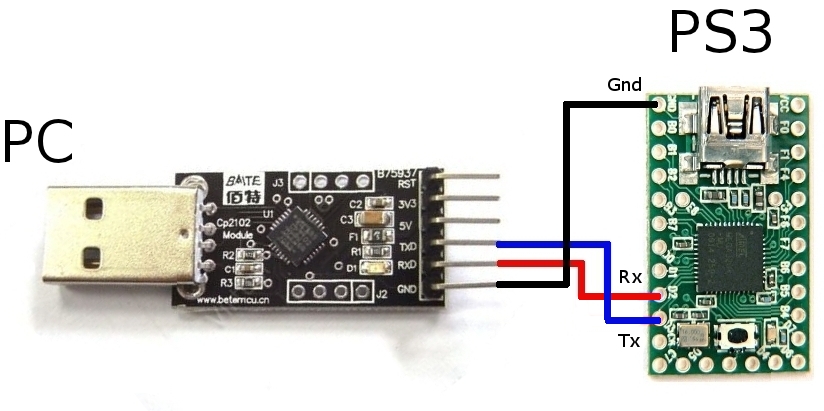
Warning: Rx and Tx may be inverted on the usb to serial TTL board.
The CP2102 converter in the above example has inverted Rx and Tx.
If you use the arduino on-board USB to serial converter, Rx and Tx are inverted.
Examples:
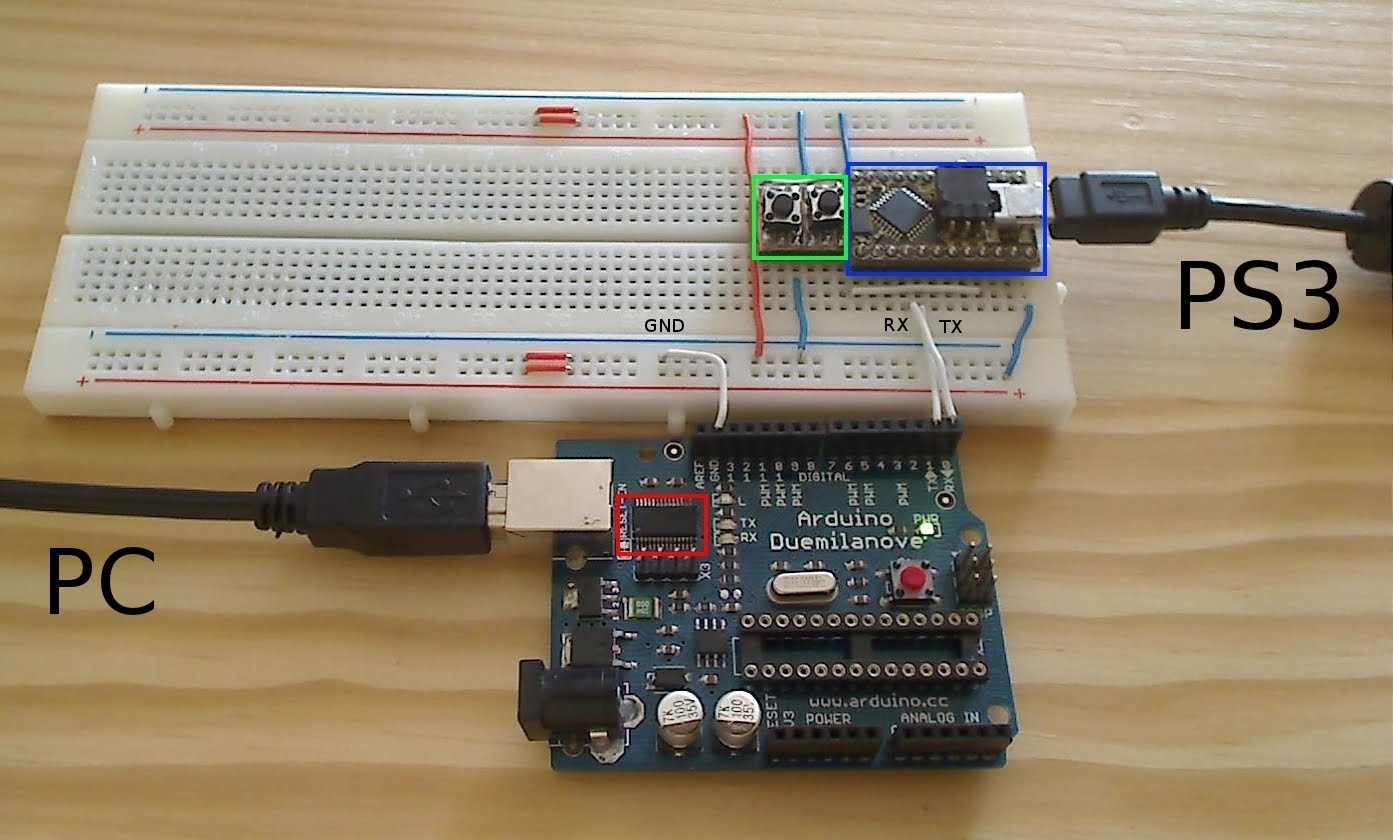
- Bumble-b and FT232RL wired on a breadboard:
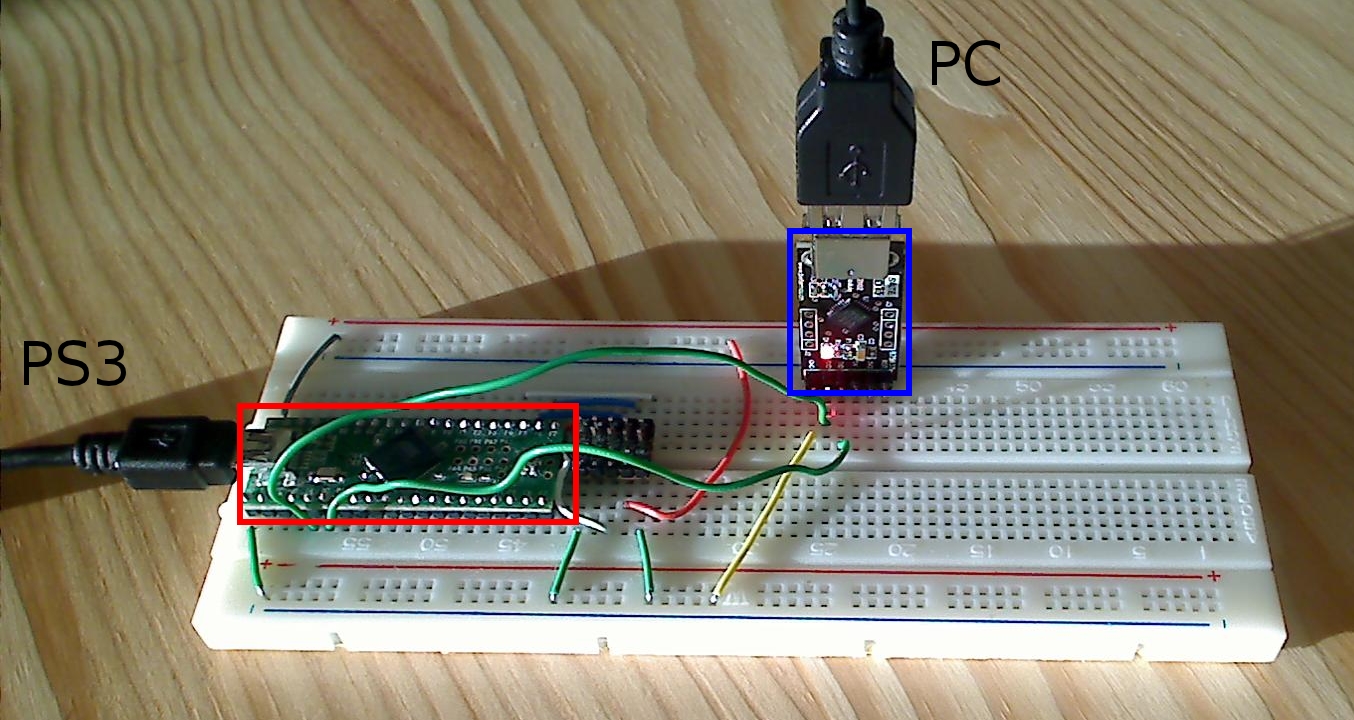
- Teensy++ and CP2102 wired on a breadboard:
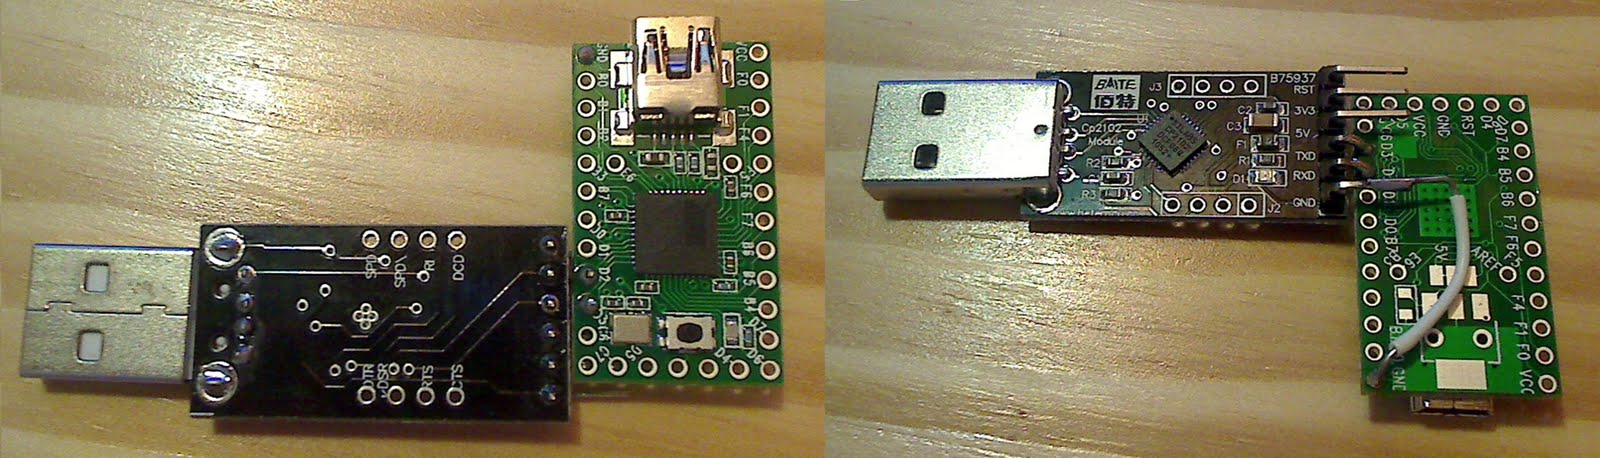
- Teensy and CP2102 soldered:
If you are using windows and a CP2102 usb to ttl board, install the CP2102 windows drivers first.
Connect the USB to serial converter to your PC, and connect the usb dev board to your ps3. Turn the PS3 on (the ps button is not working yet). The ps3 should detect a joystick (turn a sixaxis on, it should be detected as controller #2).
If it's not already done, install the sixemu package (v0.23 or higher).
Start gimx-serial:
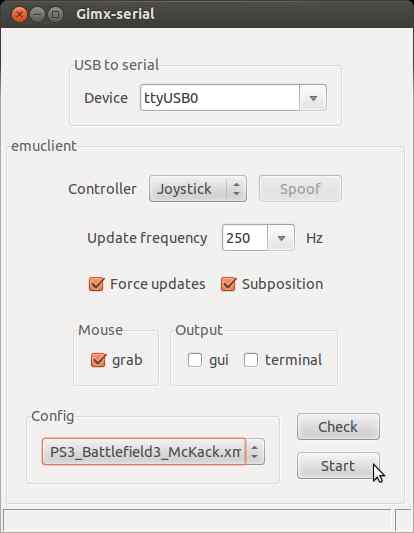
In Ubuntu/Linux, the USB to serial TTL converter should be detected as "ttyUSB0", and as "COMX" in windows (with 'X' a number).
Start emuclient & play!
Notes:
- Don't set the frequency to a value higher than the mouse frequency (ask google about your mouse frequency, or let the value to 100Hz).
- It's not recommended to run at 500Hz or 1000Hz, unless you have a realtime linux kernel (running at 500Hz with a 500Hz mouse may generate some small glitches).
- For details about the installation & the configuration of the sixemu software, read the following tutorial: link.
- All buttons are "digital" (i.e. value is 0/1, not in 0-255).
- No PS3 button yet.
- This is not a true sixaxis emulation. Some games like GT5 are not compatible with gamepads other than the sixaxis. Tested: COD: BO, BF: BC2.